
Lauren Malhoit
Deploying the Free Trial: Part 3
You've installed Micetro, imported IPAM info, and now it's time to connect to DNS and DHCP
Nov 10th, 2022
Deploying Micetro only takes a few minutes. Don't believe it? Check out this live recording where we installed Micetro in 15 minutes! In this artical we'll walk you through connecting to your first Microsoft DNS server. If you're just getting started you might want to check out part 1 and part 2 of this series. If you prefer to watch videos over reading, we've got you covered.
For the sake of this article we're going to assume that you have a new installation of Micetro deployed, perhaps the Free Trial, as well as your IPAM information imported or created, but your DNS tab is still looking awfully empty.
What else do you need?
Micetro will work with Windows DNS servers, ISC, and of course public cloud and external DNS providers. In the demo shown above I'm using a Windows DNS server, and in fact, I have everything installed on the same server.
- Micetro Central
- Micetro Web UI
- IIS
- DNS
You could spread this all out, and of course if you're already running a DNS server you can easily just connect to that even with your Free Trial. Micetro is an overlay and orchestration solution, which means that you gain visibility and control, but without having to retarget all of your devices to Micetro. They'll continue to talk to the current DNS server and Micetro will talk to that. So there's no risk to deploying Micetro and no risk to removing it either.
If you don't already have a DNS server or prefer not to connect to your production servers, you can go ahead and install one for testing purposes on your Windows Server using the Add Roles and Features Wizard.
Installing the Agent
In order to connect to a DNS server, you will need to install a Micetro agent. Now with Microsoft you actually don't need to install an agent on every server if you have multiple DNS and DHCP servers. You'll only need one agent installed in your domain, and as long as those other servers can connect to it and use it as a proxy, you won't need to install any other agents.
For the first one, though, we'll need to install that agent. It's a very small foot print and you can download the executable right from the Free Trial website. It takes about 30 seconds to install on your DNS server. Just follow the InstallShield wizard, and you only need to decide on the location where you'd like it installed or accept the default.
Connecting to the DNS Server
Now we get into the Micetro UI itself.
- Login to Micetro
- Go to Admin >> Server Management
- Click on Add DNS Server
- Fill out the form with the Server Name, Server Address, Server Type
- Click Confirm.
There is an option to select "Agent Free" and then fill in the address for the Proxy server. This is what you would choose if you had already installed an agent and previously connected to a Microsoft DNS/DHCP server, as I mentioned in the section above. We'll leave that unchecked in this example since this is the first connection.
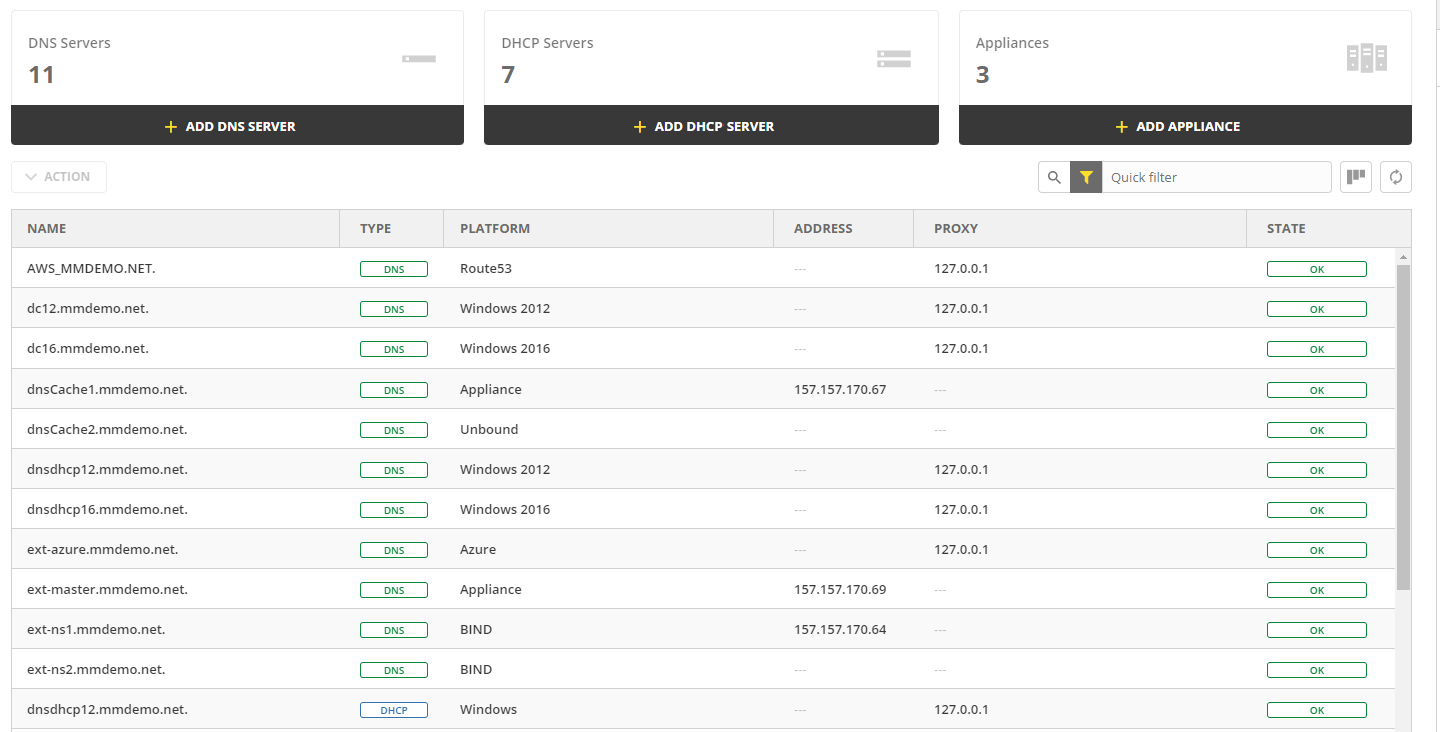
Now you should have seen the server pop up in the window below and hopefully see that the State is listed as OK, as shown below.
Immediate DNS Information
Now that you've connected, Micetro will have immediately populated any DNS zones and records which are contained on that DNS server. You'll be able to modify those zones and records, create/delete new zones and records, use the Micetro API, or assign RBAC permissions to specific zones or wider DNS access.
In order to create a new DNS record for example, you can double click to enter into a zone. Then click on Create to create a new record. You'll see a pop up where you can enter the Record Name, Record Type, TTL, and Address. The address will actually automatically suggest the next free IP to use based on the first few numbers you enter and the available IP information.
Then you can click to Create or use the Add to Request to start using the built-in DNS Workflow functionality, which you can read more about here.
For More Information
To get started go ahead and download the Free Trial. You can follow along with our Deployment Playlist on YouTube. And if you have any questions, comments, suggestions for improvement, please reach out!
