
Lauren Malhoit
Creating Objects Using the Micetro API and Swagger
Create DDI objects automatically using POST for more consistent network and multicloud environments.
Apr 28th, 2022
Just getting started with DDI automation? Automation workflows help us create consistent networks and consistent networks lead to better uptime and performance. Not to mention easier troubleshooting!
Creating Objects Using POST
There are several ways to access the API in order to create an object. In this article we'll concentrate on using the Swagger backend built into the Micetro REST API documentation in order to create a DHCP scope. This is especially handy for creating scope templates, so that your scopes look the same. Maybe you have a certain number of IP addresses being dealt out within every scope and then the same exclusion range in every scope. Automation helps us build in that consistency.
Over the last couple of weeks we got more familiar with the API and Swagger using the GET command, so be sure to check that out if you haven't seen it yet. If you'd rather watch the video go ahead and click play below.
Using the API Documentation and Swagger
We'll get started by jumping into the API documentation by going to: http://<Micetro web services>/mmws/api/doc. This should be available to you as long as you have Micetro web services installed.
Once in the API documentation you can toggle on DHCPScopes and then toggle on POST /DHCPScopes. As you can see from the description in the image below, this "Adds a new DHCP scope."
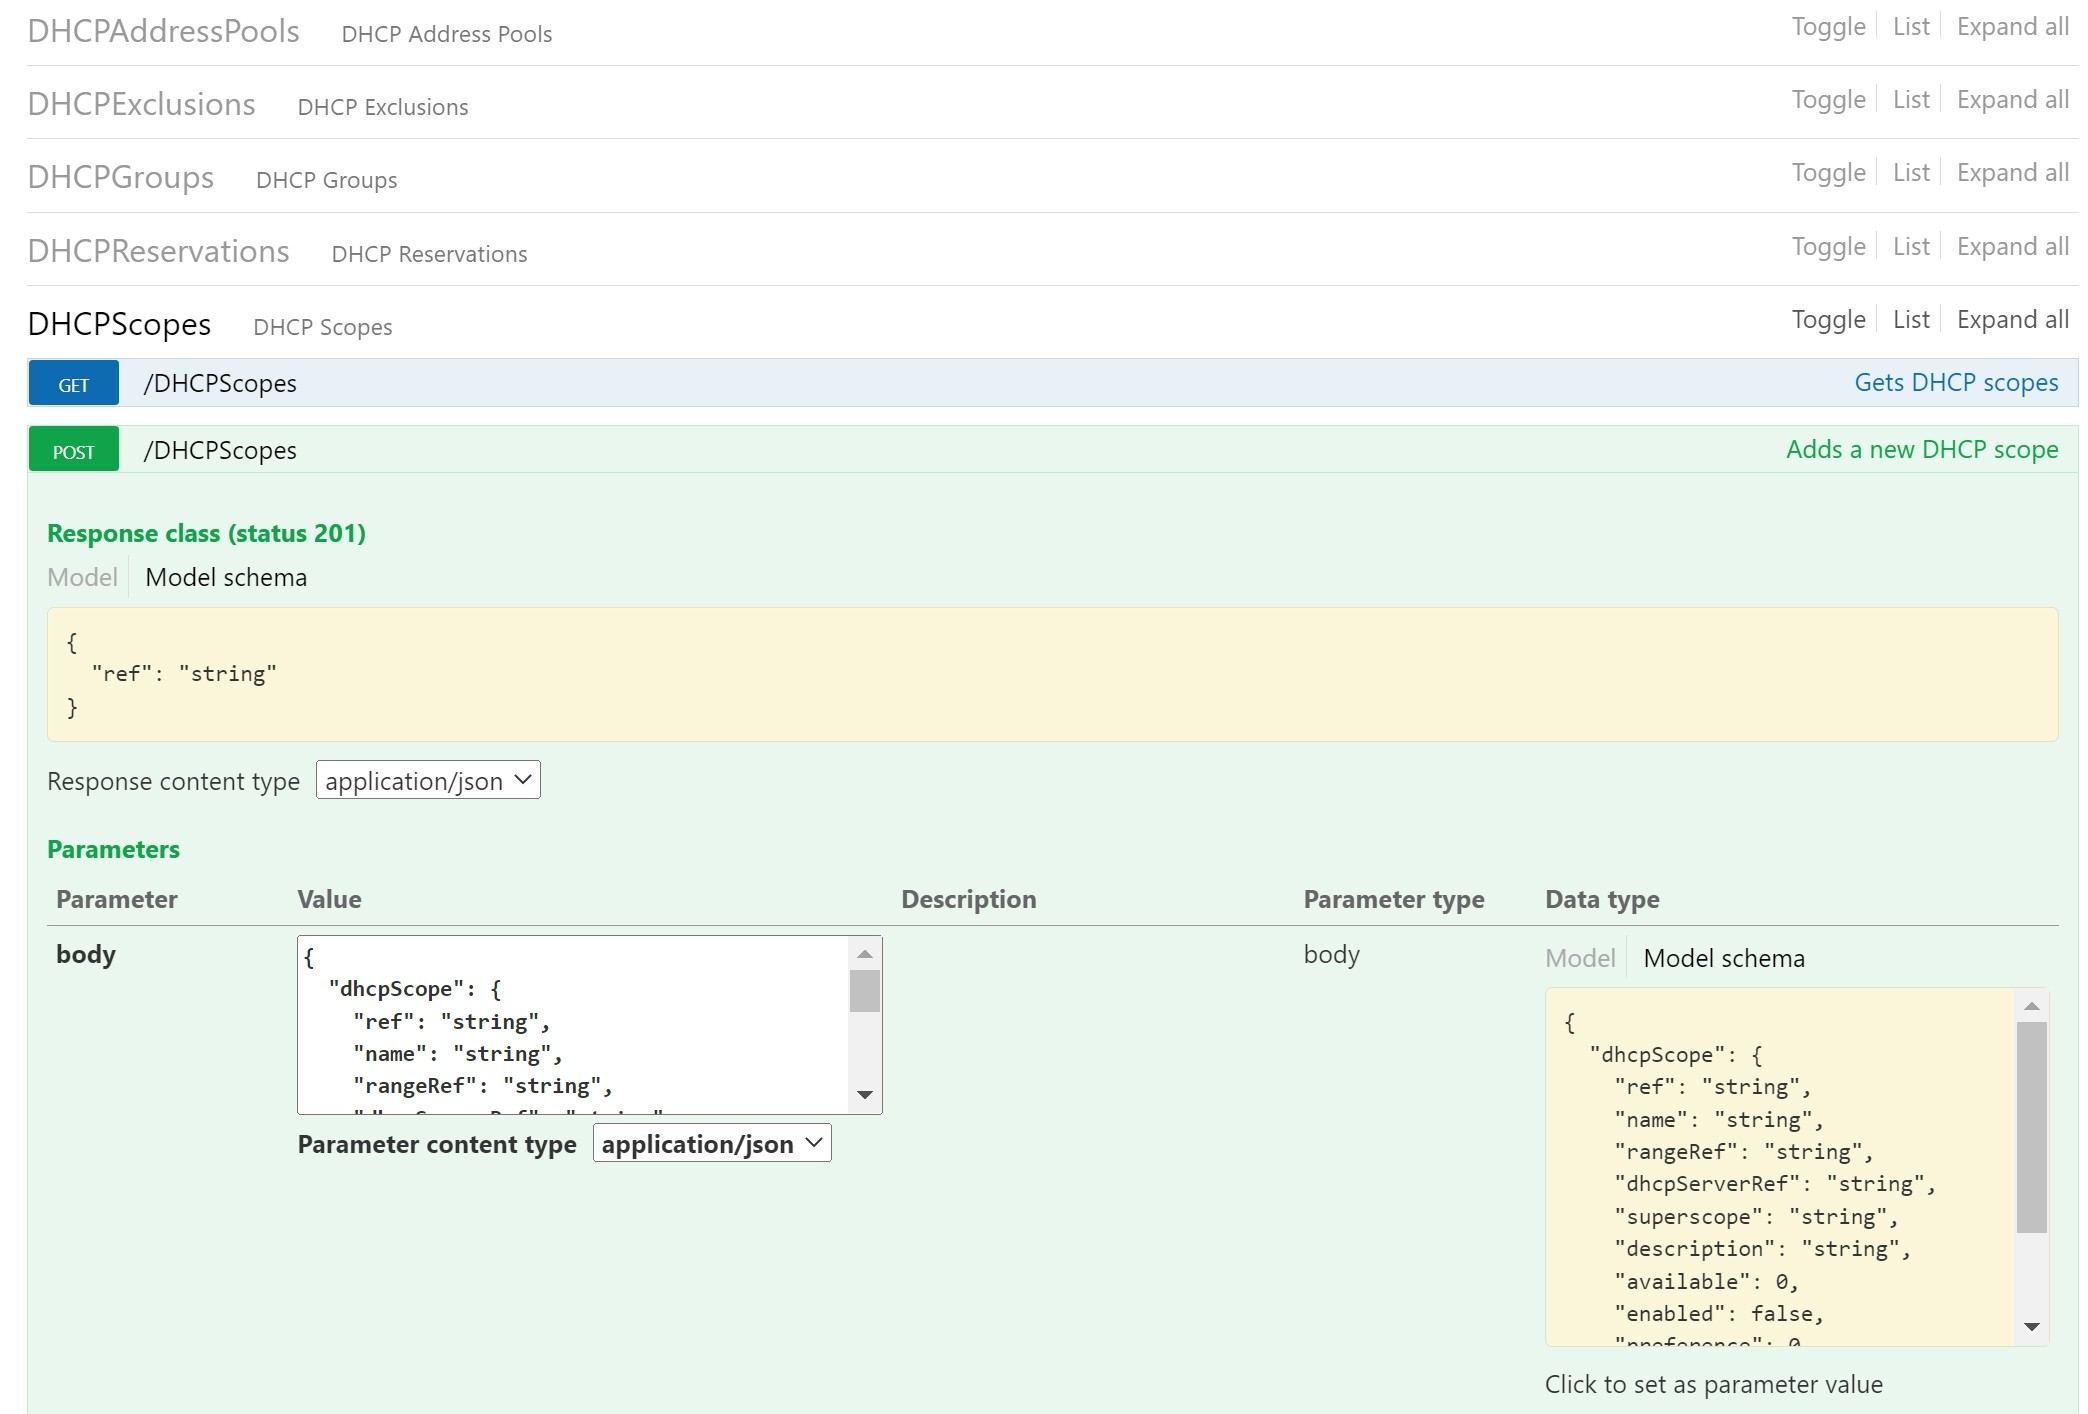
The swagger backend of this documentation makes it really easy to fill out the required parameters so that we can create a new DHCP scope. By simply clicking in the Model Schema window under Data Type, this will automatically copy and paste the information over in the Value field. Now all that's left for us to do is fill in the variables for the values here.
How to Get More Information on the Values
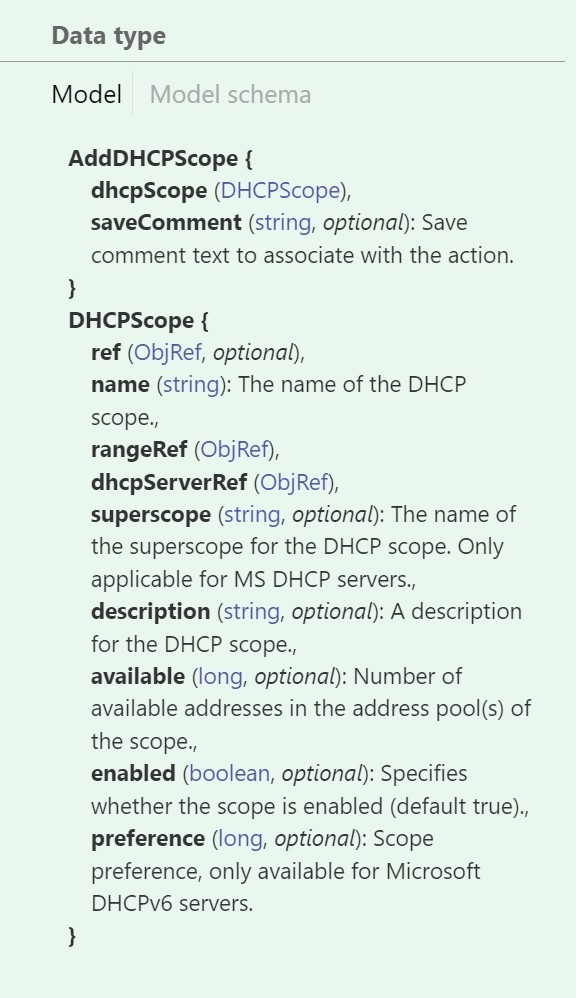
There are a few ways to get information on what kind of information we can provide when creating a DHCP scope programmatically. One way is to click the Model link to actually see the definitions of these values as shown in the picture below. We can also see what information is optional.
Another way to familiarize ourselves with this information is simply to use the GET command to understand what the software is looking for. Find out more about how to use GET with the Micetro APIs here.
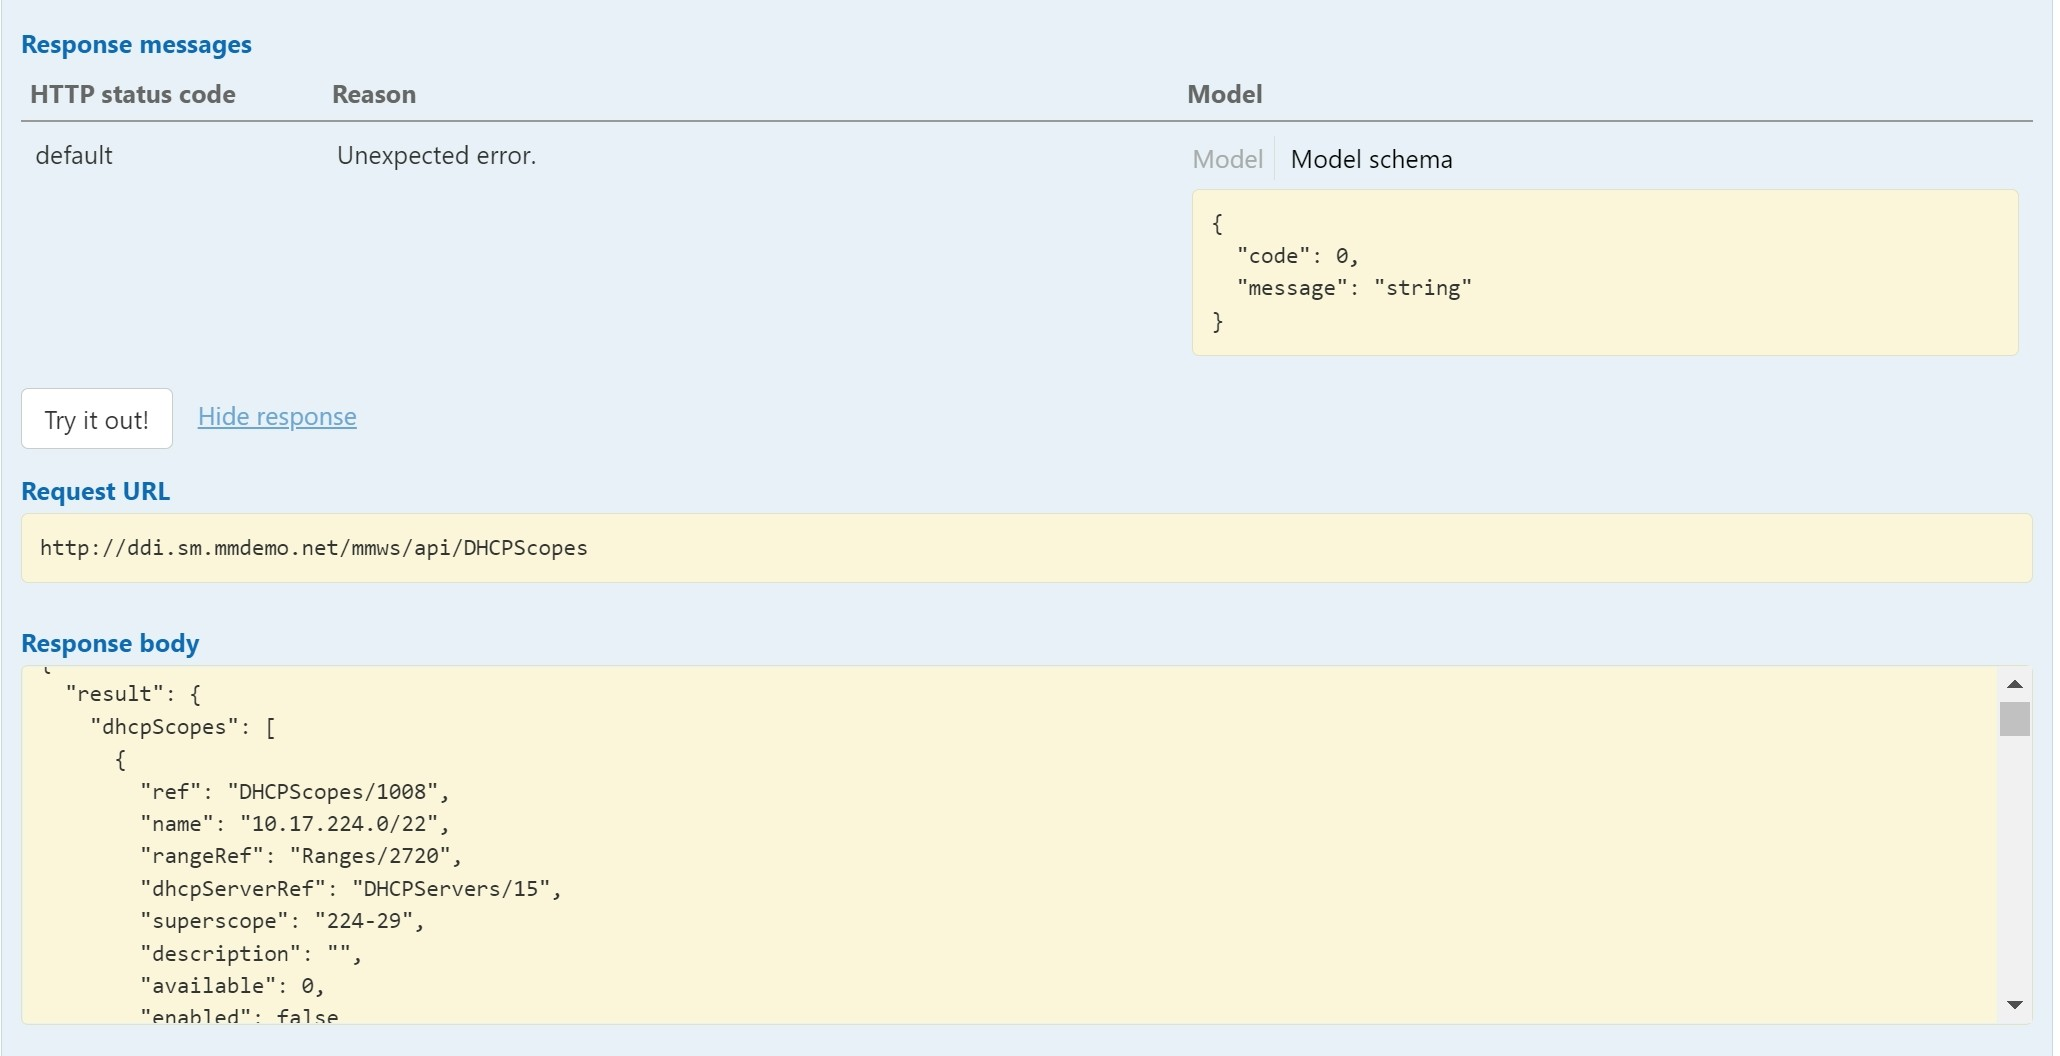
The image above shows the response after clicking on "Try it out!" under the GET command with no other parameters filled out. This shows us what reference numbers are, what kind of information can be specified, and then we can use that information to make sure we're filling out the POST information properly.
Filling out the Parameters
We'll just fill out the minimum parameters for now to see how it works.
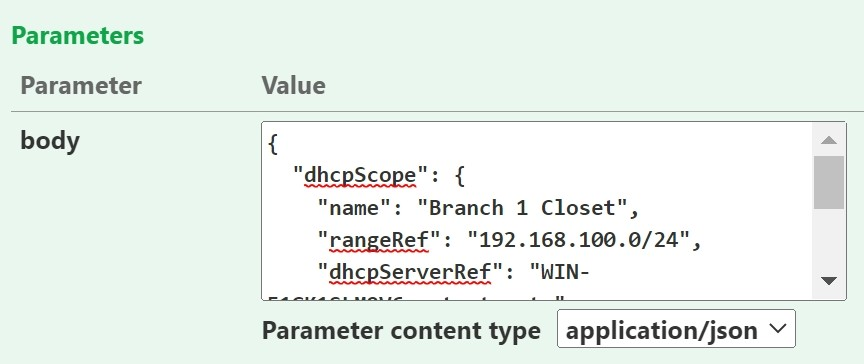
Here are the full parameters, which you can copy and paste in your own environment if you like:
{
"dhcpScope": {
"name": "Branch 1 Closet",
"rangeRef": "192.168.100.0/24",
"dhcpServerRef": "WIN-51GK1SLM9V6.mmtest.net.",
"enabled": true
},
"saveComment": "LM Demo"
}
Above, we've given the DHCP scope a name: "Branch 1 Closet." You can specify anything you like as a name, as it's looking for alpha-numeric string data. You could also just put in 192.160.100.0 if you wanted.
The "rangeRef" object is actually looking for the IP range we plan on using. This IP range must be in existence already. You can check either using the UI or the GET command to make sure that this IP range doesn't have any IP addresses which are already in use. If we try to start handing out IP addresses that are already in use, then we'll get an IP address conflict which will result in downtime either for the user or for whatever device is already using that IP.
The "dhcpServerRef" is the FQDN (fully qualified domain name) of the DHCP server where we want this scope to be located. We can find the FQDN either by just pinging it, or by connecting to the server itself, or even easier, through Micetro Service Management.

We've set "enabled" to be true, which enables the scope, or turns it on, so that the server may start dealing out IP addresses.
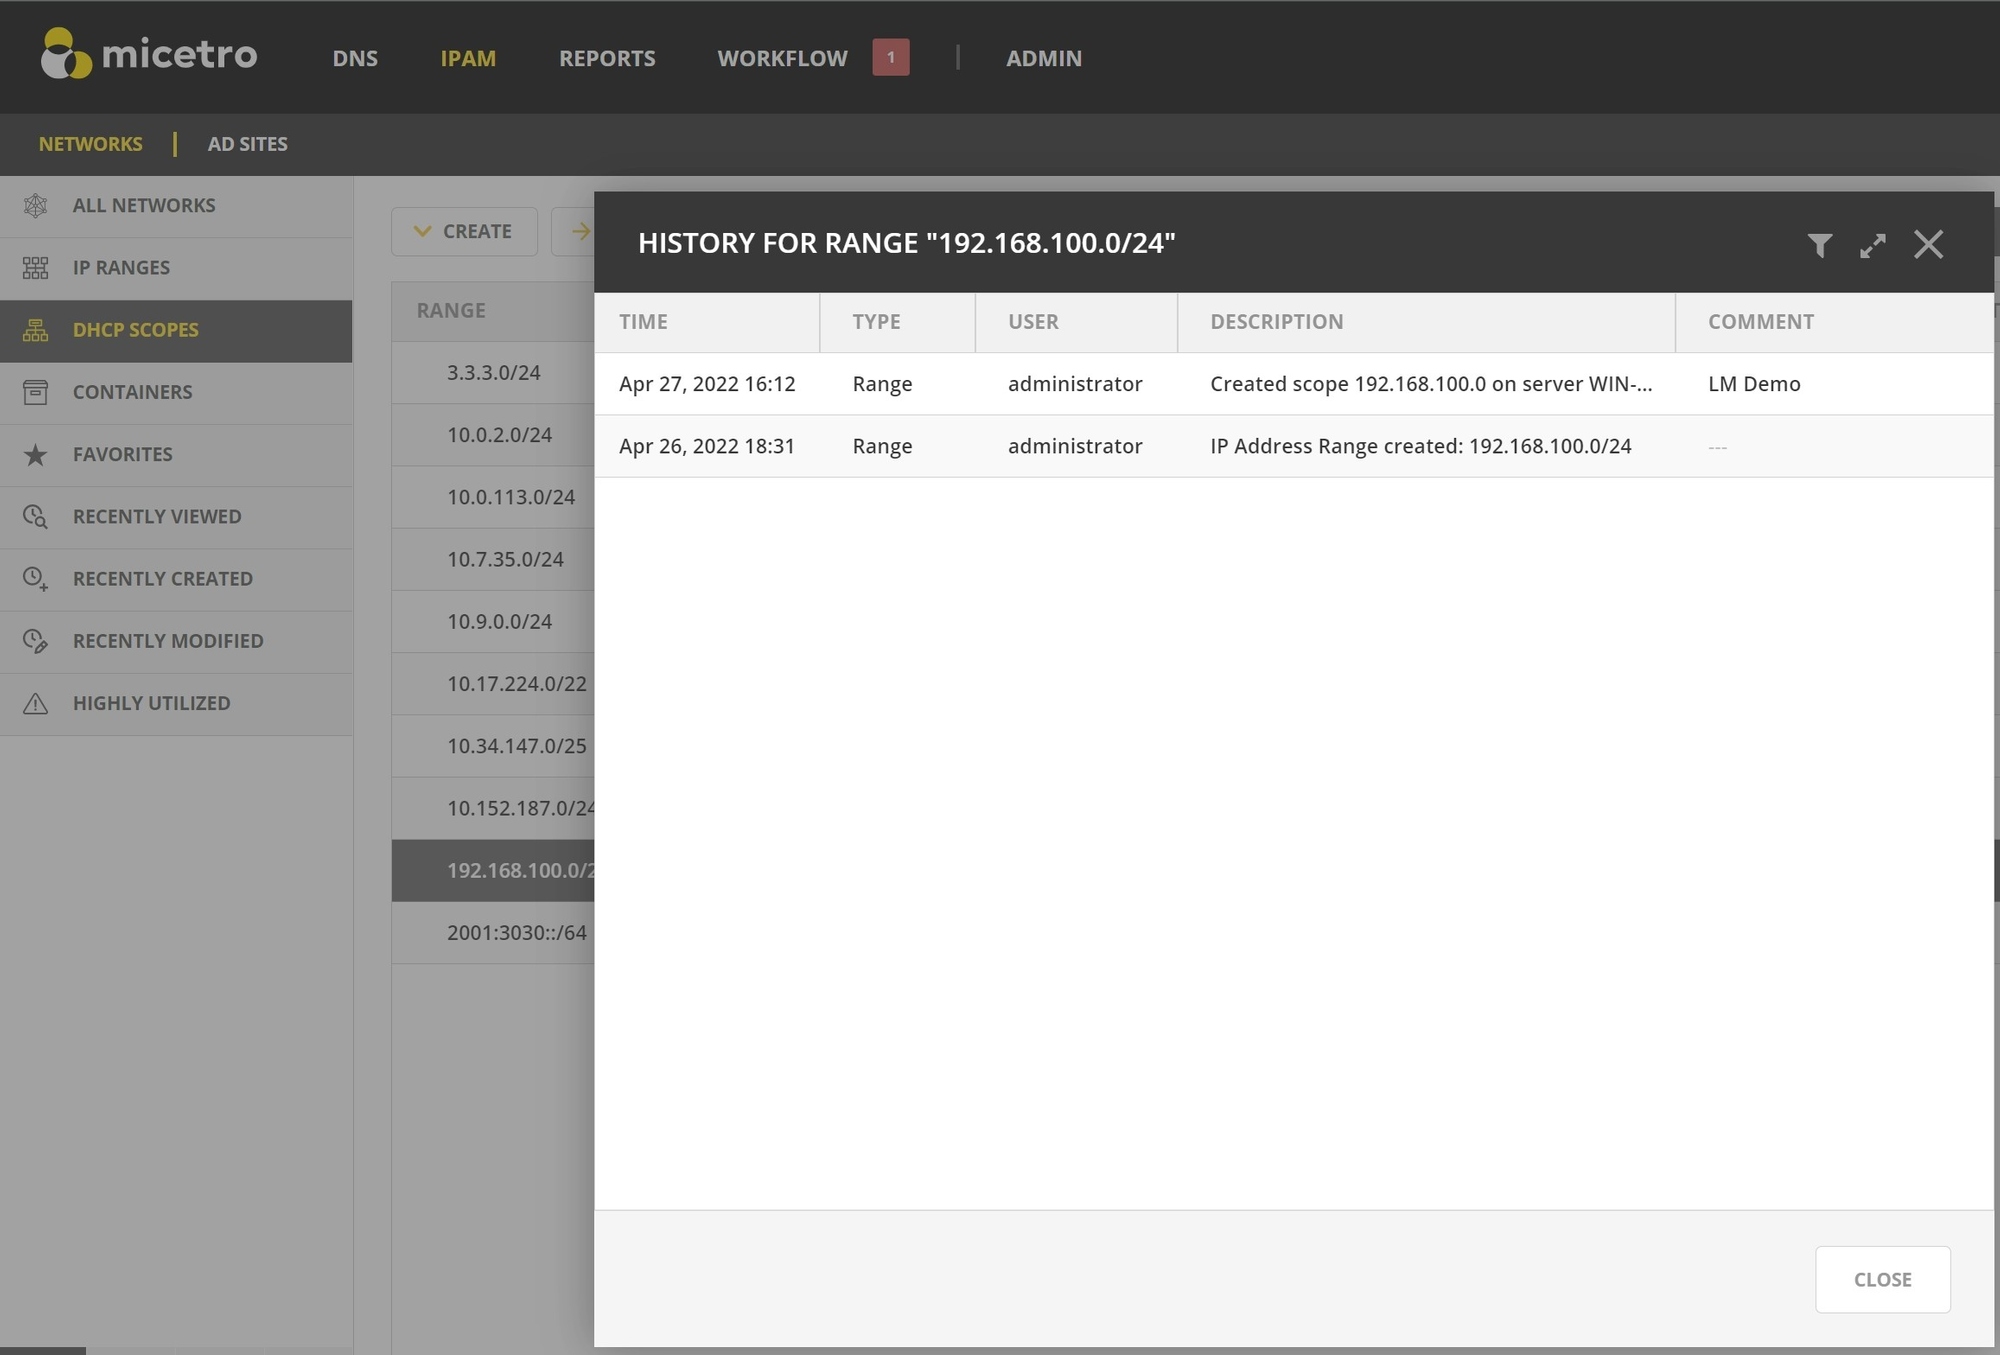
Finally, we've put a comment in the "saveComment" value. This isn't a required action, but can certainly be of help when we are looking into the history of an object.
Success!
Now in the API we can click on "Try it out!" at the bottom of the POST section and we should get a 201 response code which means the creation of the DHCP scope object was successful. To test this out we can go back to GET to see if it shows up there or back in the web UI to make sure the new DHCP scope has shown up. Luckily it has, and when we go to see the History by clicking on the meatballs menu for that scope, we can even see the comment in there.
Try it out!
Now that we've gotten familiar with creating an object using POST, go ahead and see what POST actions you can perform in other areas of the API. If you don't have Micetro, you can download a free trial to get started. If you have any questions or suggestions for what you would like to see in future automation blogs and videos let us know!
