
Lauren Malhoit
Configuring Micetro with AWS
Find out how you can simplify multicloud DNS and IPAM operations with an overlay DDI solution.
Jul 21st, 2022
How do you go about using a DDI overlay solution to manage and observe your cloud DNS and IPAM services? Let's go through a few common technical use cases and tasks in this blog.
In previous weeks we've talked about the why behind multicloud architectures in general and why using a DDI overlay solution is the way forward. In this blog we'll take a closer look at how to do it. As they say, the proof is in the pudding. You can read along or actually play along if you simply download a free trial of Micetro. Don't worry, because we're an overlay, we're non-disruptive and you don't have to change any of your devices to point to us.
Role-Based Access Control
Micetro offers fine-grained role-based access control for your entire DDI environment. We'll work with Active Directory, LDAP, and, of course, identity services within AWS.
You can use the default roles, build on them, or start from scratch to create custom roles. There’s also a range of primitives including but not limited to; create, add, read, list, edit, delete, use, enable, and release that can be applied to objects (and their sub-objects) to create roles governing:
- Micetro Administration
- DNS servers
- DHCP servers
- DNS zones
- Ranges and DHCP scopes
- Address spaces
- Cloud Networks
- Cloud Services
- ISC DHCP groups
Access control can be monitored and modified via the API as well. Check out the video below for more information.
Modifying DNS in AWS
From the Micetro web UI, it is trivial to create zones in Route 53. Once you have DNS administrator privileges, you just go to the “DNS” section and then “Create/master zone”. Enter the full Zone name (not forgetting the trailing dot), e.g., “aws.menandmice.cloud.” and ensure you select the correct Master server, which, in our case, is the cloud service called “AWS-Multicloud”:
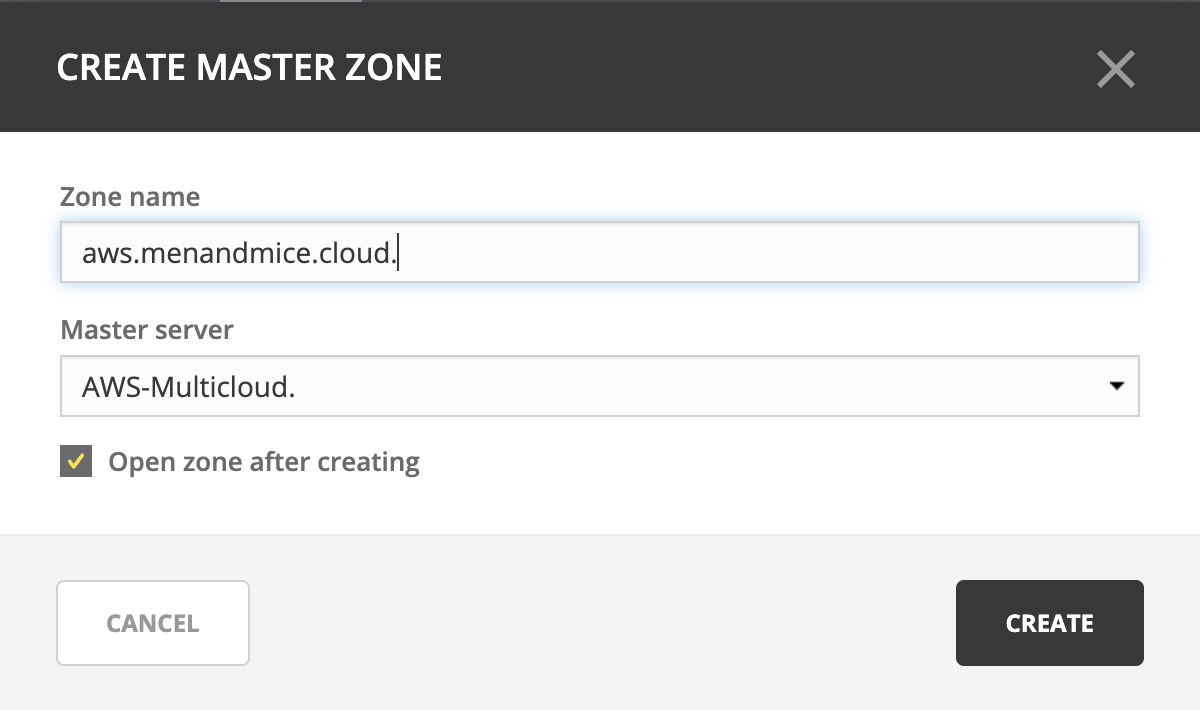
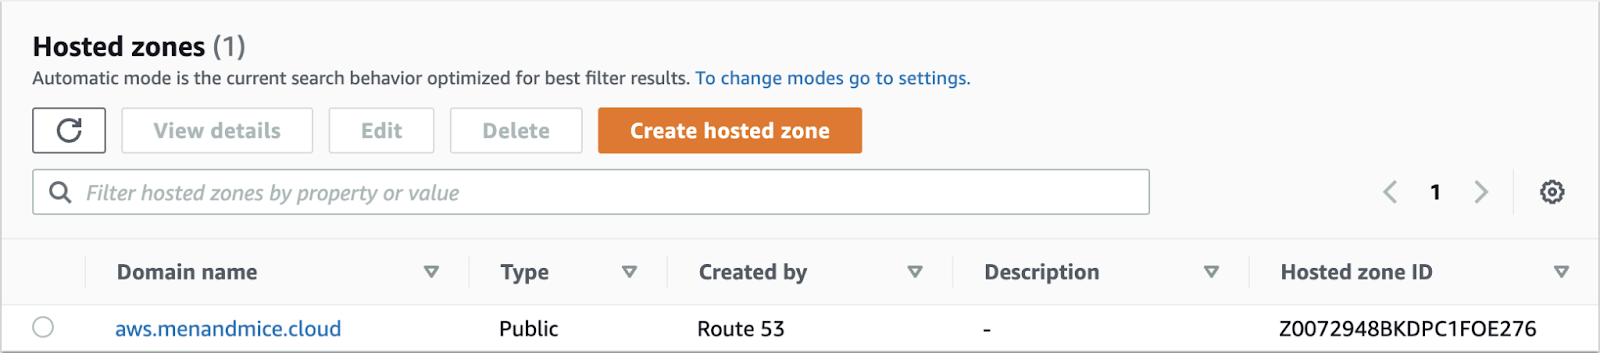
To validate this, once submitted, you can see that the zone has been created in AWS Route 53 (below) including the SOA and NS records.
In Micetro, you can subsequently perform actions on the zone such as “Open”, “Migrate”, and “Delete” while also assigning fine-grained access permissions via Micetro’s RBAC by selecting “Access”. You can also see the full administrative history of the zone.
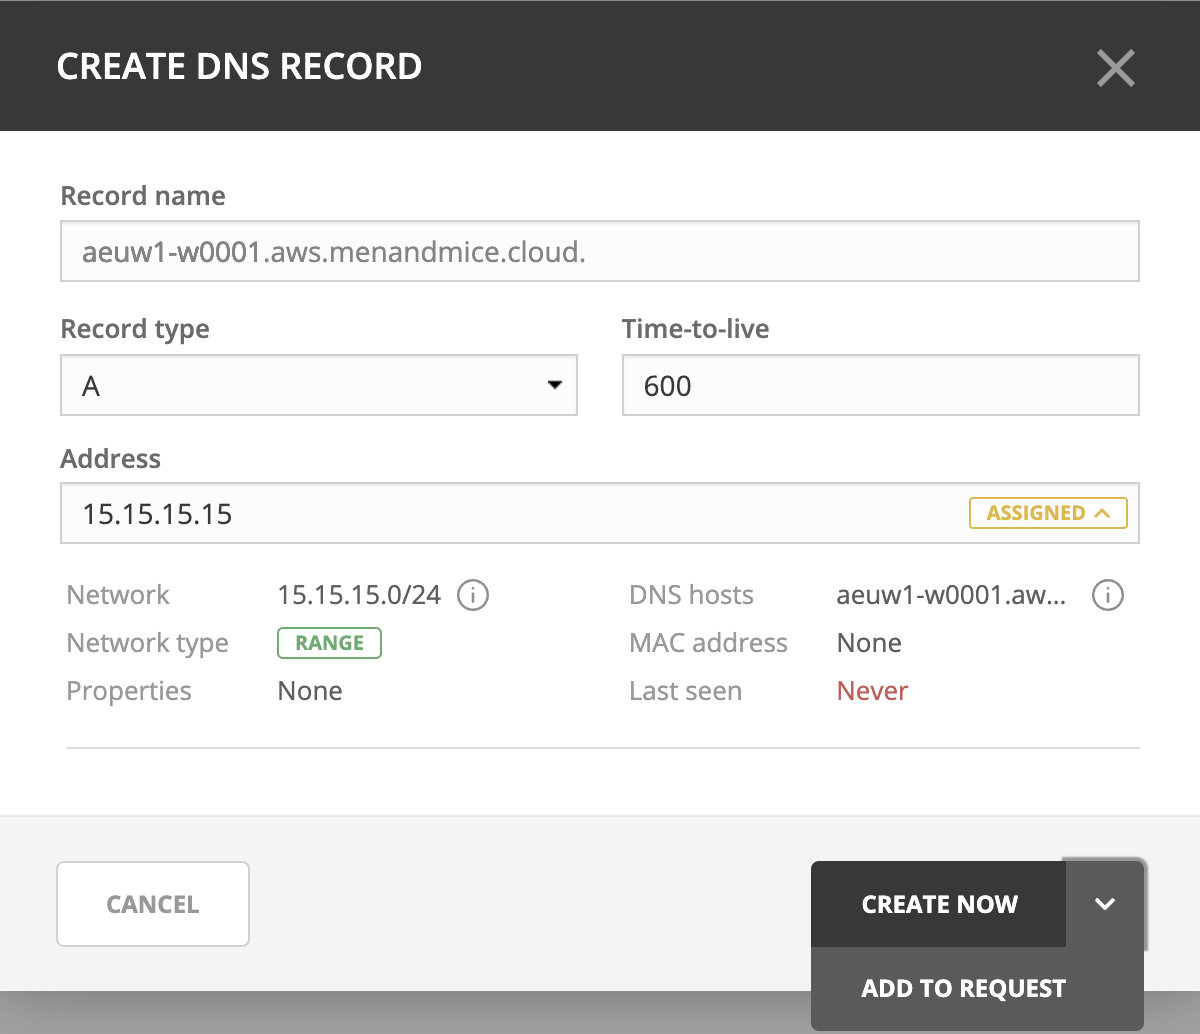
Creating / Editing Resource Records in AWS Route 53
Now, let’s create some records in our newly delegated zone of “aws.menandmice.cloud.”. As a DNS administrator, we can choose to create and action a request immediately, or if we’re a Requester (built-in), we can submit this as a change request.
Once it has been approved and actioned (if you’re a DNS Administrator, you can action immediately), we can see that the record has been created in Micetro:

And in AWS Route 53:
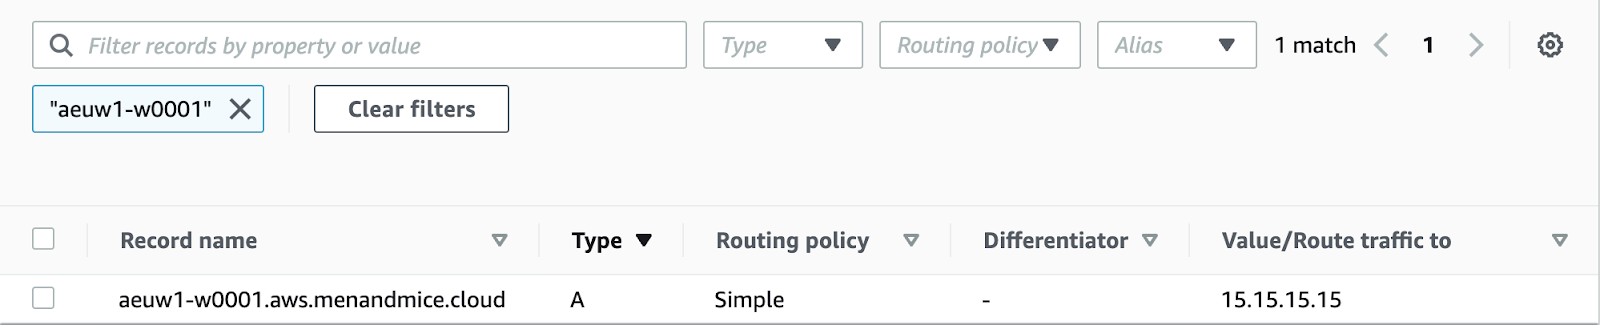
So, from a single UI (or API) we can administer records across all our cloud services and DNS servers.
Setting up a VPC in AWS
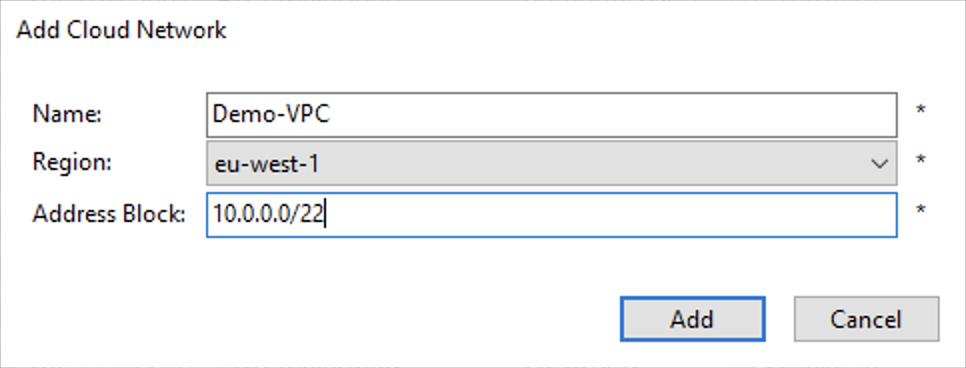
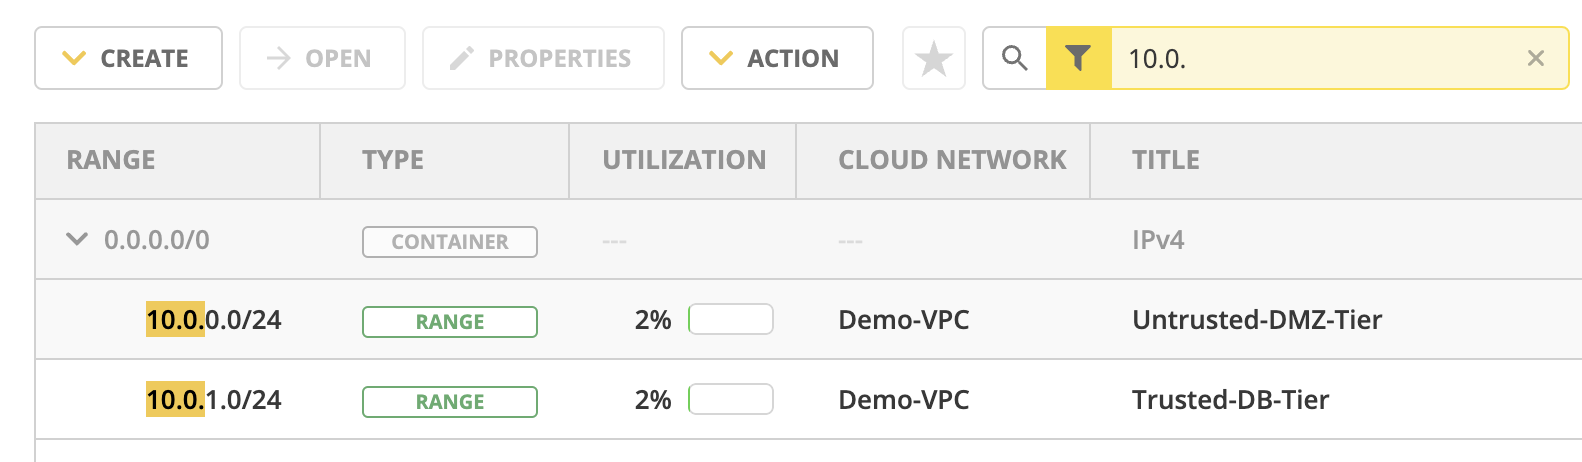
Micetro makes this easy, and it will also track our IP allocations via the IPAM. Let’s create a VPC in our “eu-west-1” region using the CIDR block of “10.0.0.0/22” from which we will allocate two separate subnets of “10.0.0.0/24” and “10.0.1.0/24” from the lower /23.
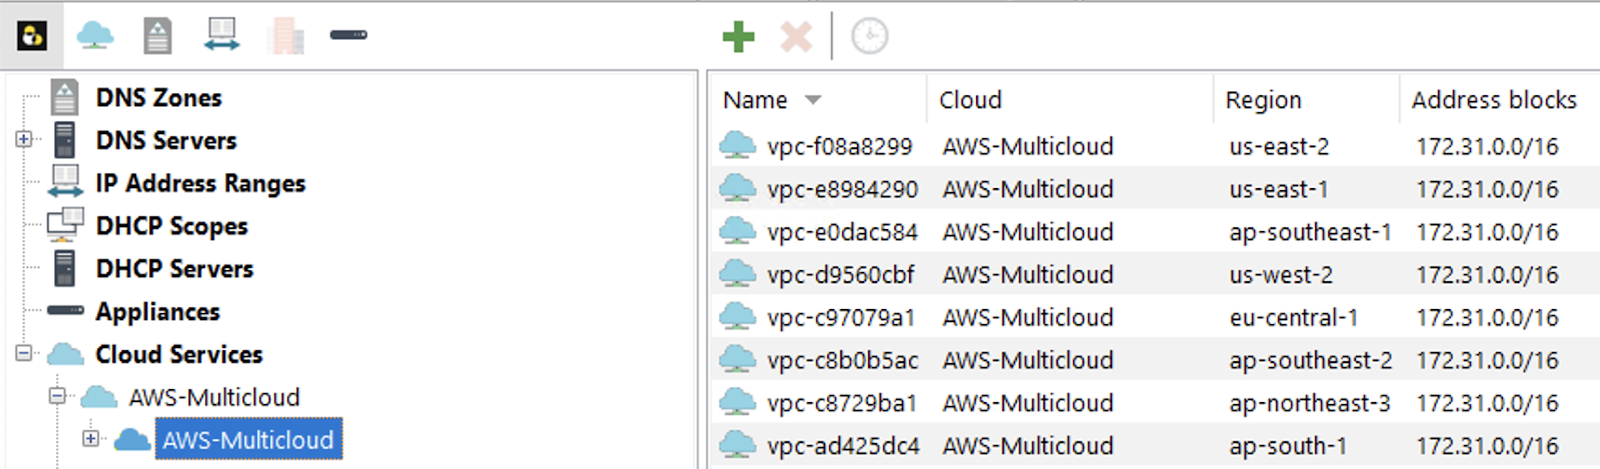
From the Console, select the appropriate cloud service and then use the green plus (or Ctrl+n) to add a new Cloud Network:
Enter the Name, Region, and Address Block required and click Add:
And we can now see our new Demo-VPC listed in Micetro:

But we can also see Demo-VPC is now available and ready for action in AWS:

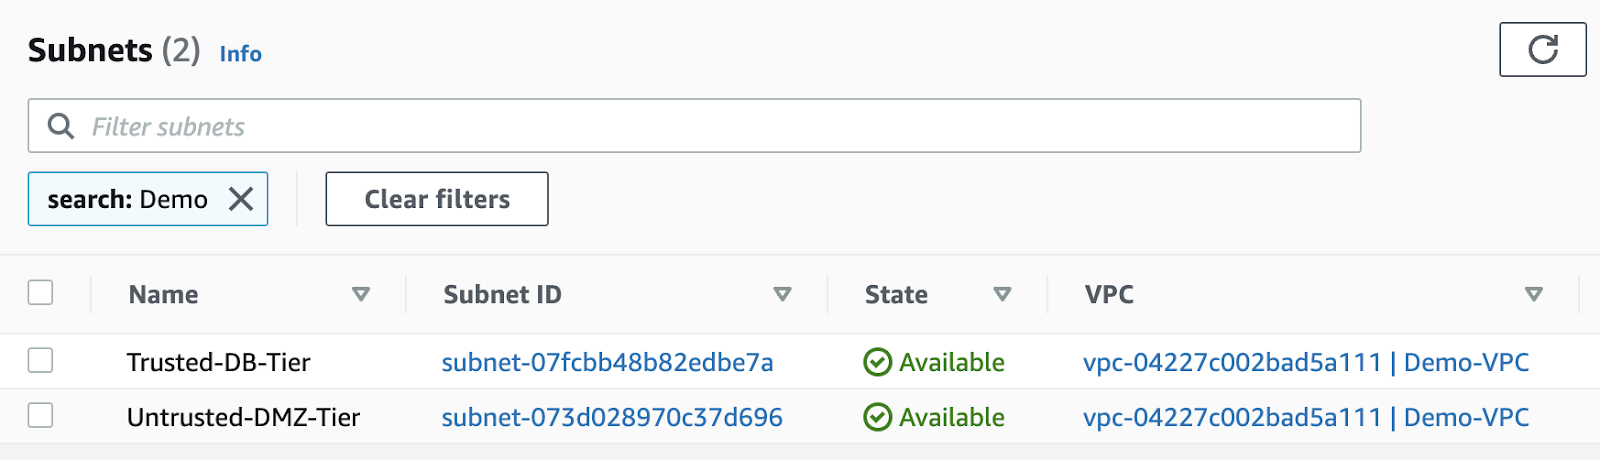
We will now create two subnets inside our newly formed Demo-VPC. We use the green plus button (or Ctrl+n) again to add the details we want for each of the new subnets using the details below:
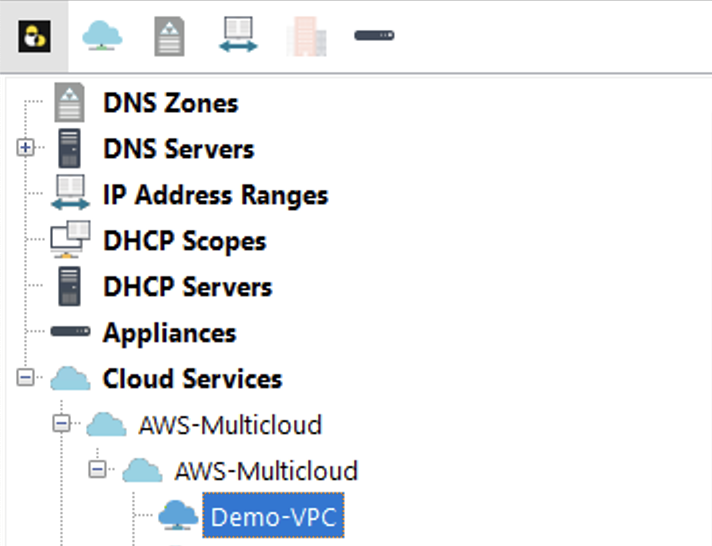
Figure 13.0
Details (subnet 1):
- Subnet: 10.0.0.0/24
- Title: Untrusted-DMZ-Tier
- Description: This is our example initial DMZ tier within the VPC.
- Cloud Network: Demo-VPC
- Address Range: Reserve Network and Broadcast Address
Details (subnet 2):
- Subnet: 10.0.1.0/24
- Title: Trusted-DB-Tier
- Description: This is our example trusted DB tier within the VPC.
- Cloud Network: Demo-VPC
- Address Range: Reserve Network and Broadcast Address
This results in our subnets also going live in AWS VPC:
Meanwhile, we can see that our subnets are also being tracked in our unified Micetro IPAM:
For Even More Technical Tips and Tasks
Check out our latest white paper on integrating Micetro with AWS. In it you'll find business and technical drive information, as well as even more configuration tips and tasks. Curious how to do all of this through the API, that's in there too!
