
Lauren Malhoit
Building Network Templates Through APIs
Create network templates for a consistent and reliable network that's less prone to human error.
Jun 2nd, 2022
Building consistent automated workflows will help you create a more reliable network. Read on to find out how you can get started by building a DHCP scope template using a Postman Collection with the Micetro API.
Why build network templates?
Some might think the answer to why we use network automation is to create network objects faster. Mention that to any systems engineer, though, and they'll instantly tell you all that does is propagate mistakes faster. This is why I love to reframe it and talk about building network templates. A template is a tried and true way of creating something in a repeated manner. This consistency allows us to create network objects, DDI objects, so they'll be reliable, easier to troubleshoot, and less likely to have an outage due to human error.
This is why having an overlay DDI solution can be so helpful. No matter where your workloads and devices reside, you can create consistent automated workflows because the overlay acts as a standardized API for your entire DDI environment.
The DHCP Scope Postman Collection
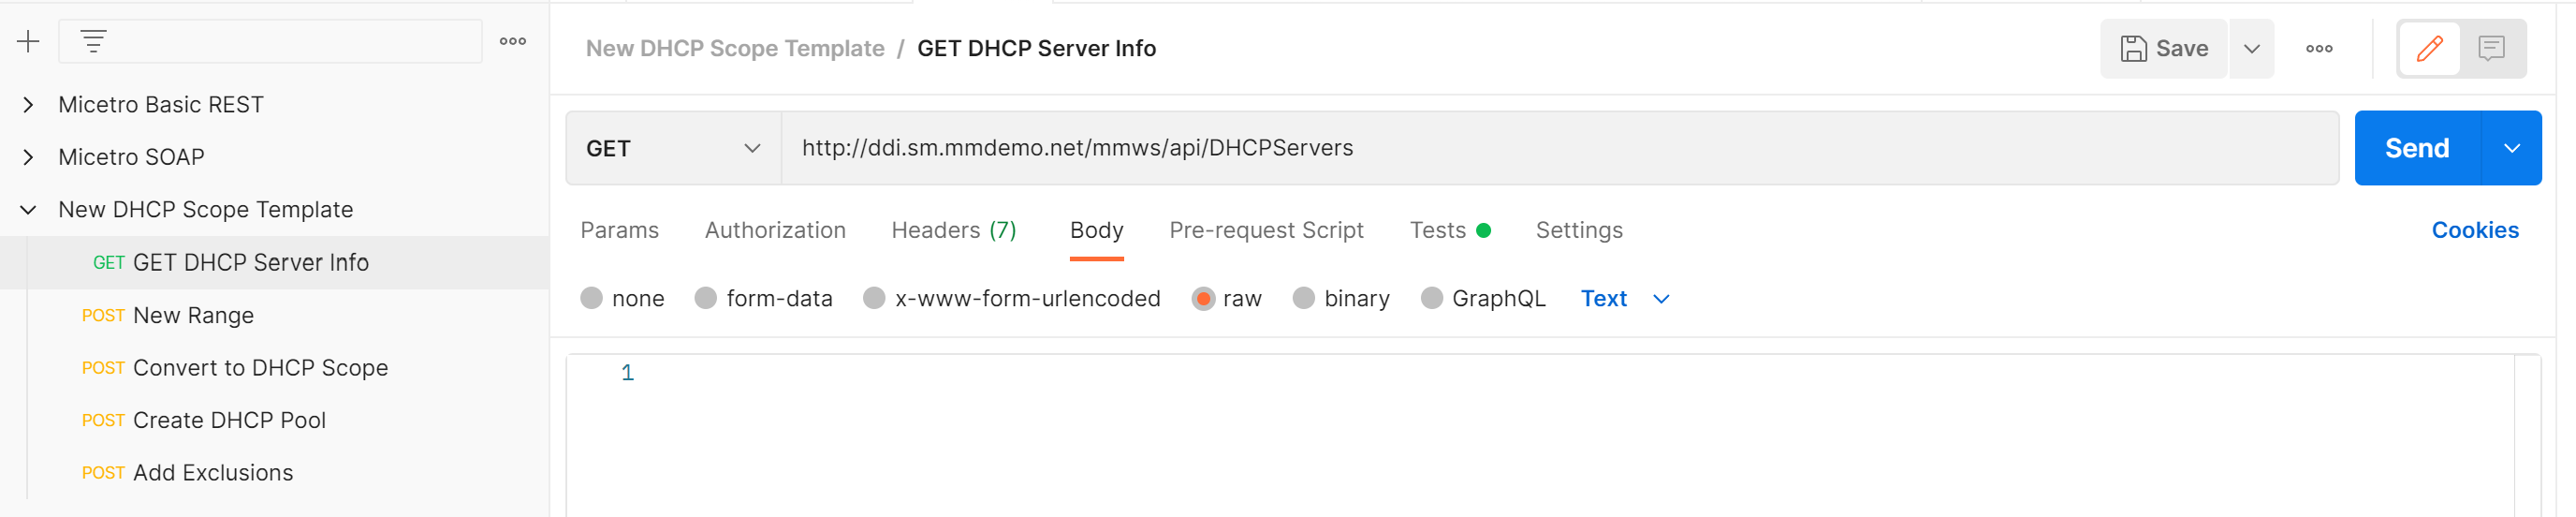
Let's dive into the collection. In this case we have just five calls in our collection. The first being an API call to get DHCP server information. I wouldn't actually count this as part of the template, but a call to get information about which DHCP servers to which we'll be assigning DHCP scopes. This will be as simple as just using the GET command with a request URL which we can obtain from our API documentation located at:
https://<micetro web service>/mmws/api/doc
The request URL will be http://<micetro web service>/mmws/api/DHCPServers
The following four API calls within this collection will be POST commands that will build our DHCP scope template.
First, we'll create a new IP Range, because in Micetro you must do that first before creating a new scope when creating through the API.
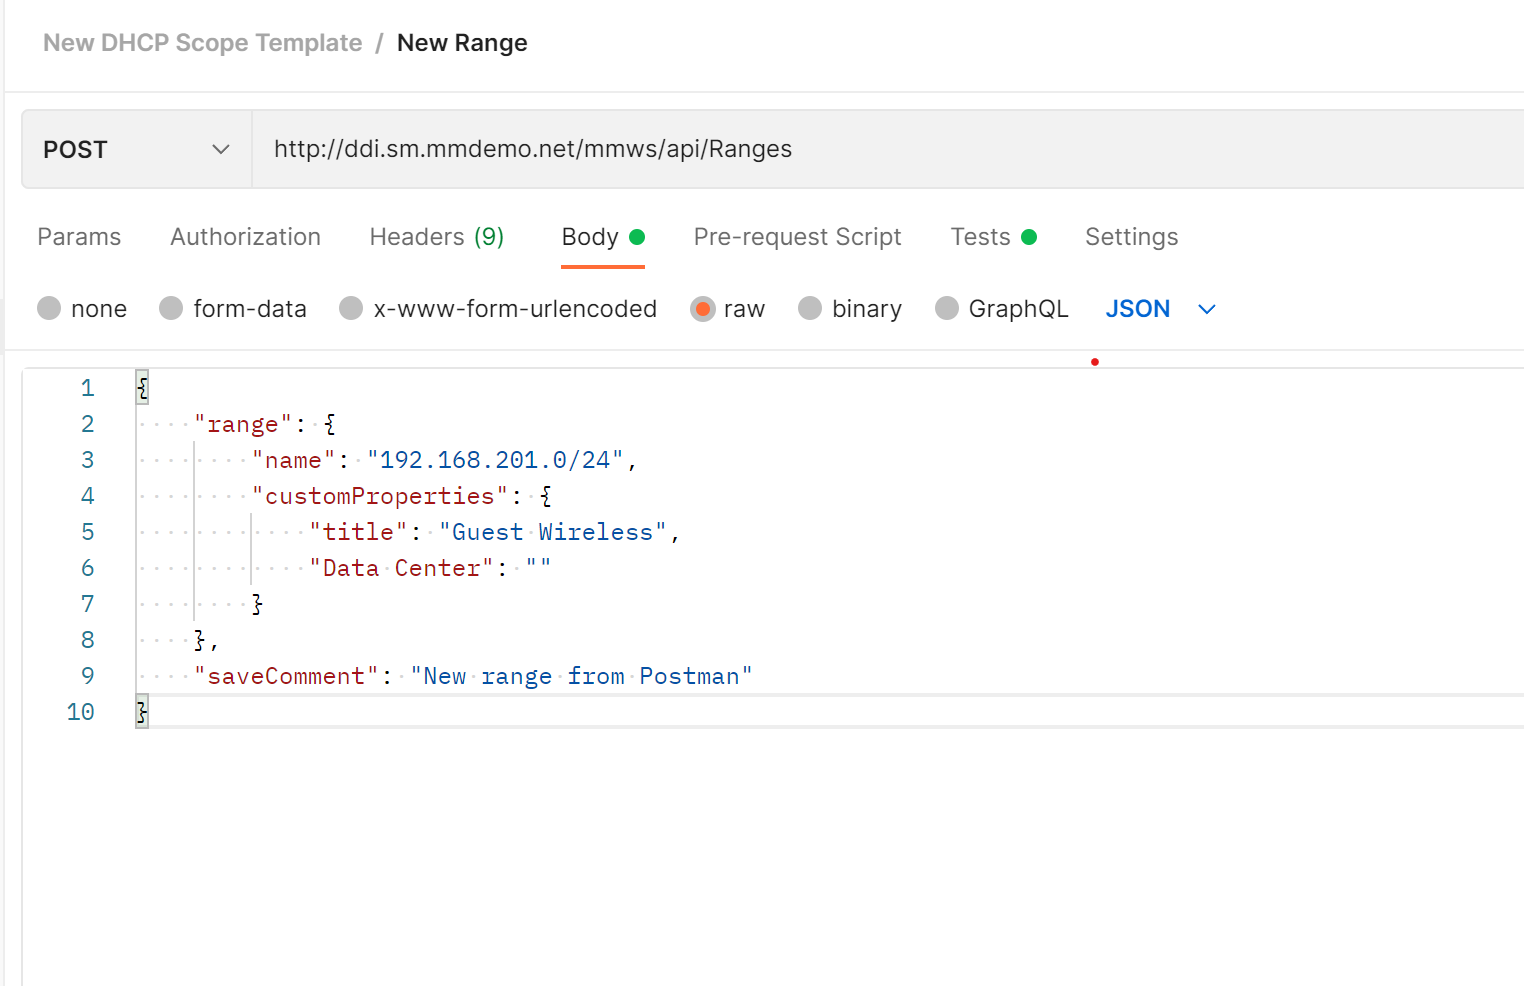
Above is an example of creating a range with 192.168.201.0/24 and specifying custom properties. In this case, I want to call the range "Guest Wireless" and assign it the default data center as specified in my custom properties. I've also assigned it a comment, which will show up in View History in the Web UI, that specifies what I'm creating.
The next call will create a DHCP scope from this range as shown below.

In this example I've also called the scope "Guest Wireless" and I've assigned it to DHCP Server 19, which is information I obtained from the first GET call. You may also use the FQDN of the DHCP server if that's easier. I've specified the same range as above, 192.168.201.0/24. In this case I've not enabled it, but I could by changing the "enabled" value to "true." I've also put a comment for logging.
Next we'll create a DHCP pool.
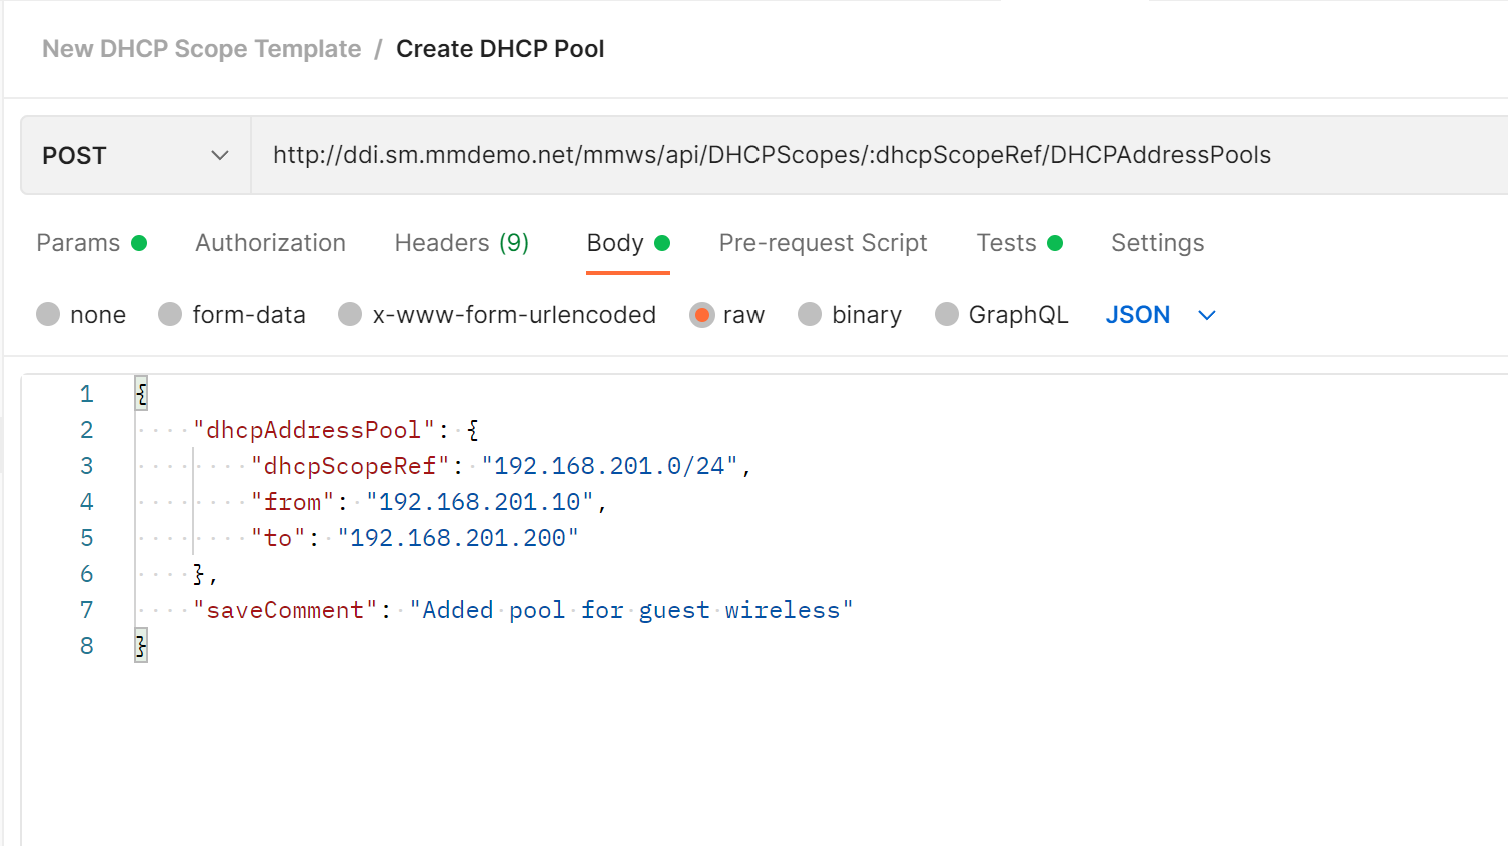
Above we can see that my pool goes from 192.168.201.10 - 192.168.201.200 and I've also added a comment for logging. This means that these addresses may be dealt out to devices that are on my "Guest Wireless" network.
Finally, we'll add an exclusion range.
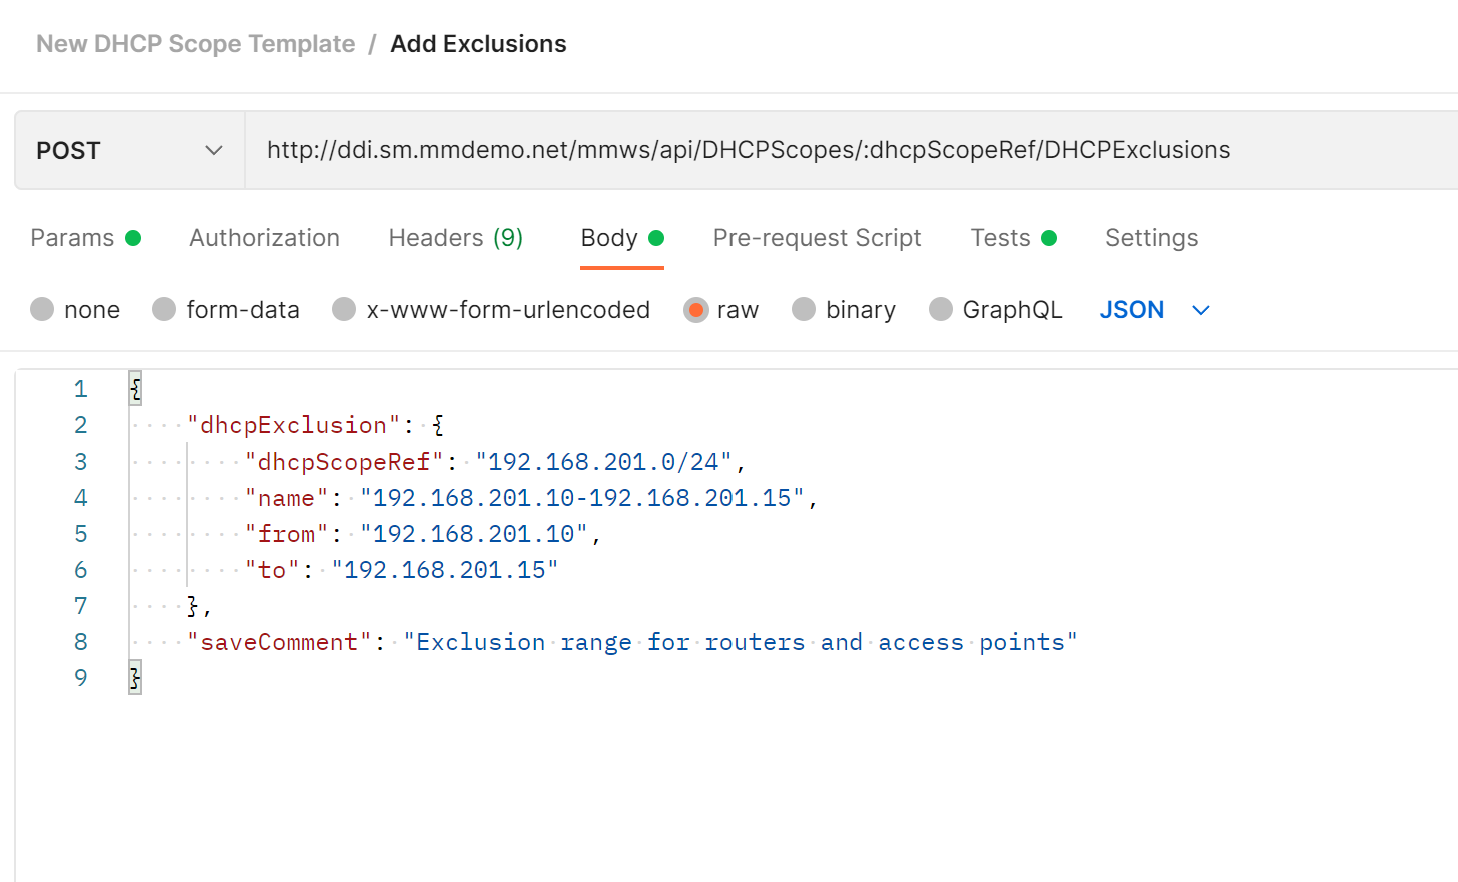
This specifies that addresses from 192.168.201.10 - 192.168.201.15 will not be dealt out. In the comments I've added that these addresses will be saved for devices like Access Points and Routers. However, we could have also added Reservations as well or instead.
The possibilities are really endless. We can add access control commands to our template and we can add more identity information via custom properties.
Running the Collection
Now, we can run each of these calls separately, but another benefit of creating a collection is that we can run all of these as a collective workflow. In order to run a collection we have to create the appropriate tests for each call, though. In this case we can keep it simple and just use one of the tests Postman provides for us which is to check that we get a response code of 201 back, which is a signal that we've successfully run the POST command.
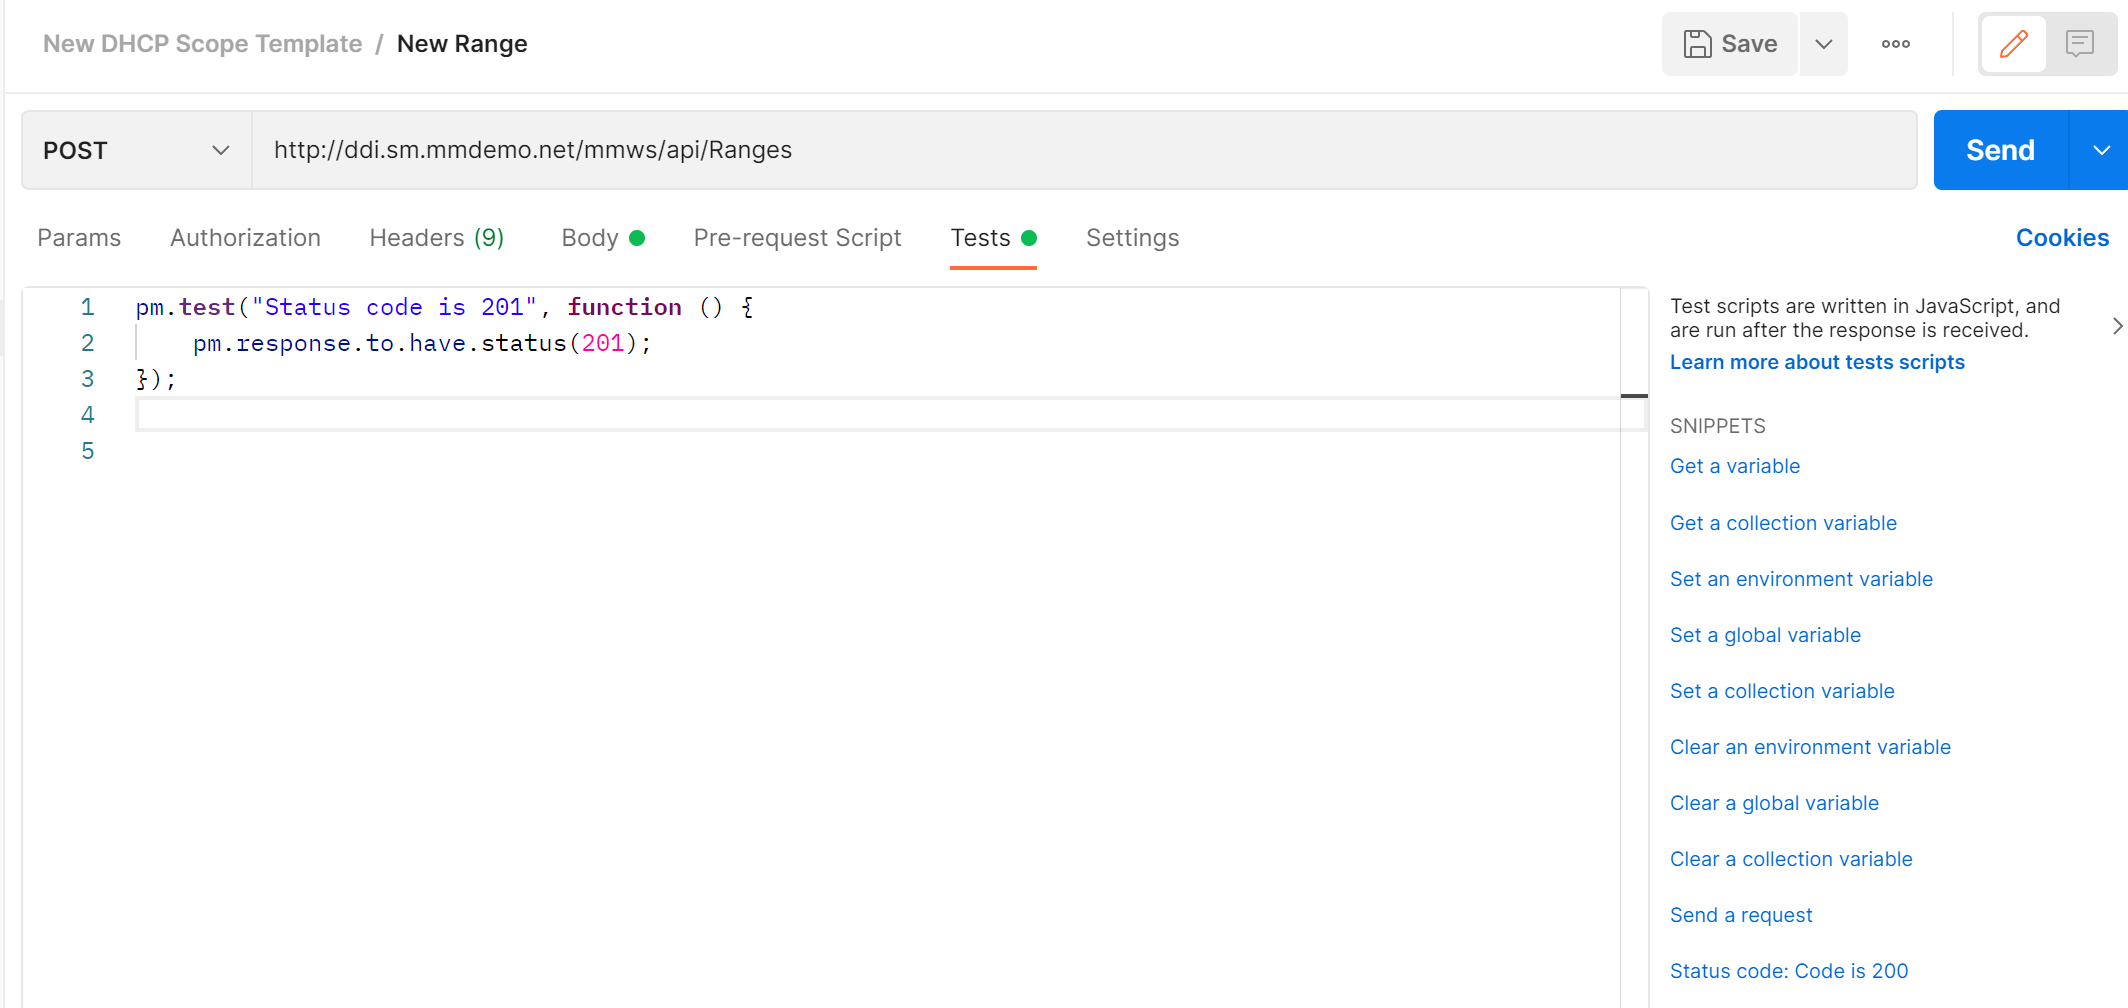
On the right, under Snippets, we just click on the "Status code: Code is 200" link and it will automatically populate the Tests window with the proper information. I did change it to 201 in this case, since it is a POST call, but the rest was written for me. We must do this for each API call.
Now we can click on the meatball menu next to the collection and select Run Collection.
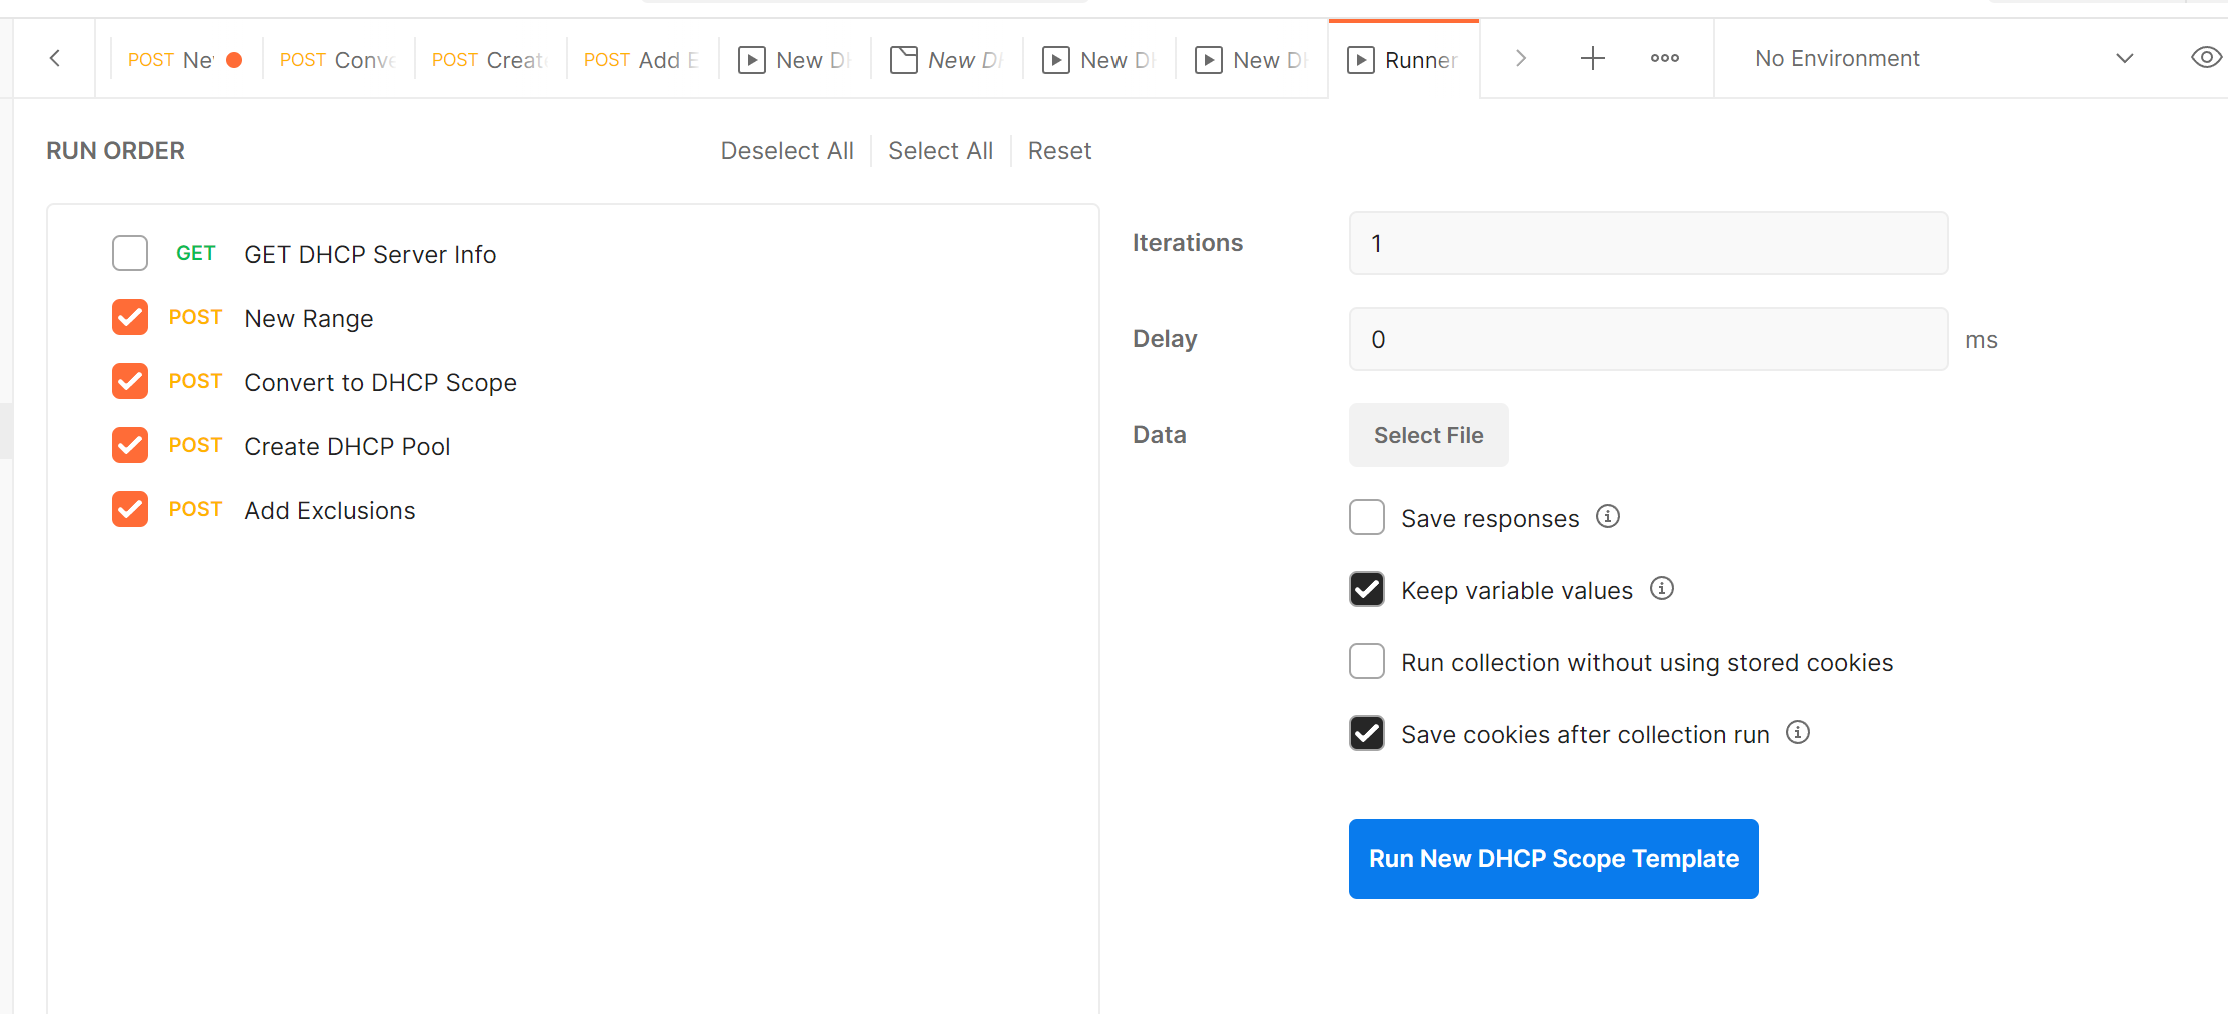
In this example, we'll uncheck Get DHCP Server Info, since that's not really a part of the template. We'll leave it at 1 Iteration and click on Run New DHCP Scope Template. This will go through the four POST commands in the order shown. Then you can see in the Micetro Web UI that our new scope has been created. If you View History you can see all of the comments logged as well.
Now, you have the ability to create dozens or hundreds of DHCP Scope programmatically by iterating it multiple times by creating a spreadsheet with all of your scope information and using variables instead in the API calls. Just change the Iterations number to the number of scopes you have, and you will have consistently created all the scopes you need. Save the Postman Collection to create a new scope days, months, or years from now, exactly the same way as before.
Reach Out
We'd love to hear what you're doing or any suggestions for what kind of automation content you'd like to see. If you're looking to get started with automating your DDI environment, just use our free trial! The beauty of an overlay is that you can install it in a no-risk way.
